Hello everyone... I put together a series of illustrations using 3D to create a quick guide on lighting. I made this with the purpose of making notes on different lighting concepts in visual rendering. I use this for rendering in 3D, 2D, and doing lighting work in general.
Note: This isn't meant to be a a comprehensive guide since most of these require elaboration to be understood in full (I can't feasibly explain color theory, light particle physics, and illusionism in one post, but I can make separate posts on these topics down the line).
So here's what I've put together...
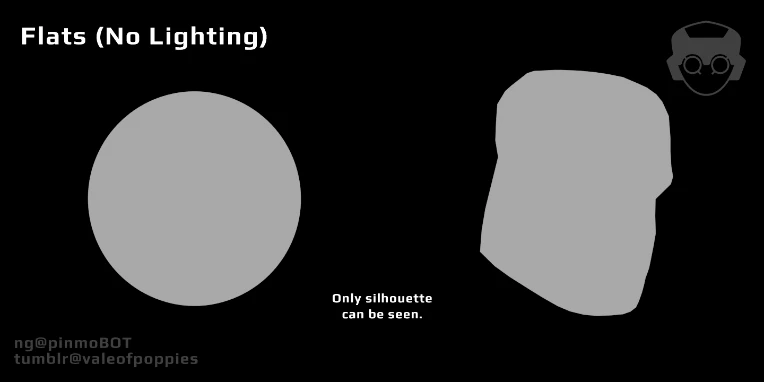
When you start off with color flats, you have silhouettes. Silhouettes are good for laying out shapes and creating compositions. It is very basic stuff to work with, but basic shapes matter when conveying shape and form.
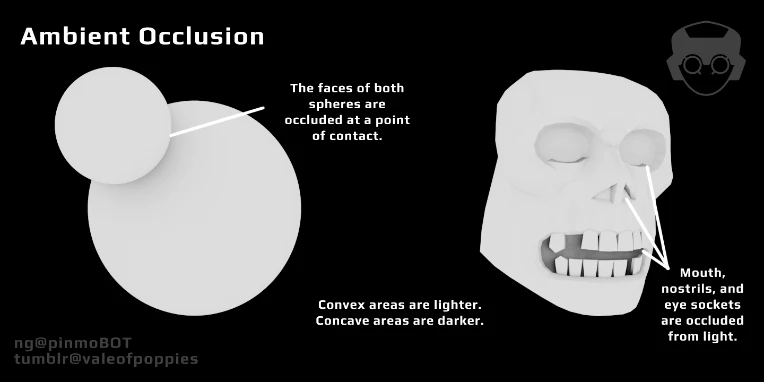
Ambient occlusion occurs in areas that are harder for light to get in. Think about how caves get darker the deeper they go. Areas like the mouth, nostrils or belly button (if you have an innie) would be logically occluded from ambient light. Notice how the areas in which the spheres come close to each other, their shading becomes diffused. That's because they are occluding each other! Holes, sharp corners, and angles can create ambient lighting based on amplitude, so intensity may vary based on shapes or complexity.
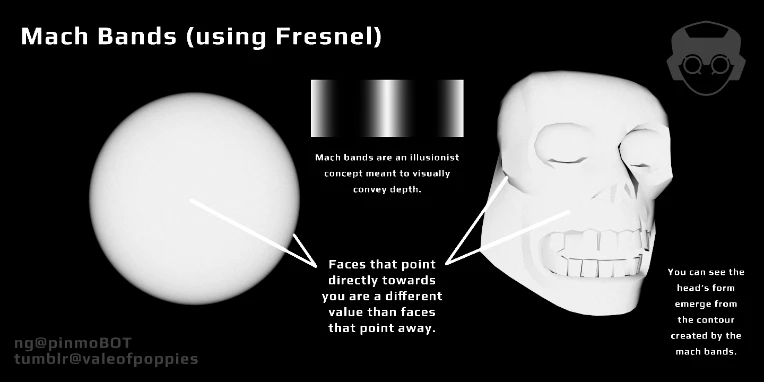
Mach bands trick our brains into perceiving depth because they reproduce light diffusion based on surface angle. When light reflects off a surface parallel to you, it appears more intense. If you hold your thumb in front of you, you'll notice that the edges of your thumb are lighter or darker than the center of your thumb (the side that is facing you). That's because the surface of your thumb turns away from you at the edge, reflecting light at a different intensity. Mach bands are best used to convey depth, so if you want make shapes more... voluminous.... then consider manipulating them to your liking.
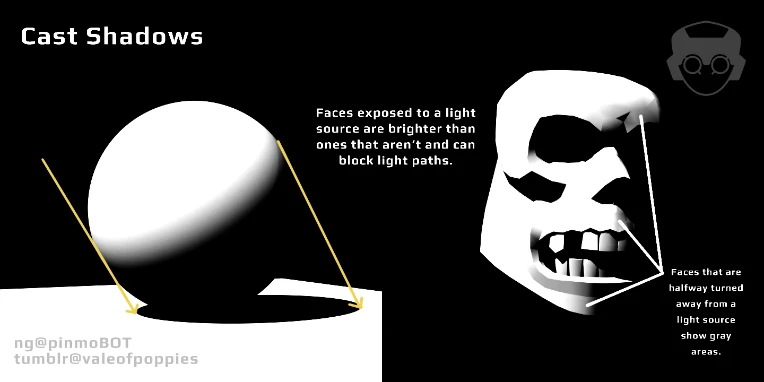
Cast shadows can be quite intuitive when working with only one light source. When manipulating a single light source, its direction determines which side of the object is supposed to be lit. However, if a light path is blocked, it cannot travel further, thus casting a shadow over areas that aren't exposed.
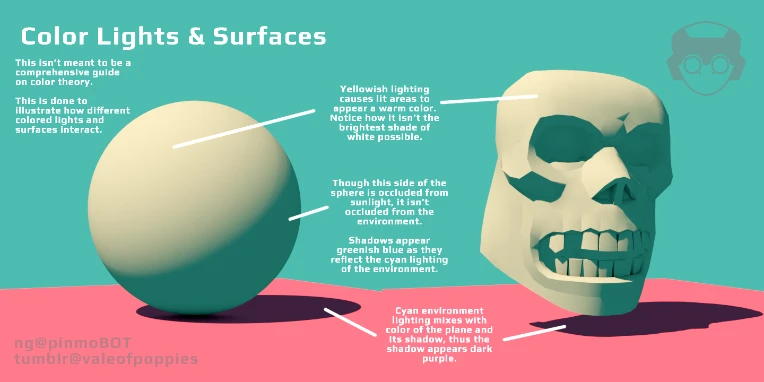
With multiple light sources, we can see that cast shadows aren't necessarily occluded from other light sources. Shadows can change color based on light position, hue, and intensity. Darker areas usually result from ambient occlusion.
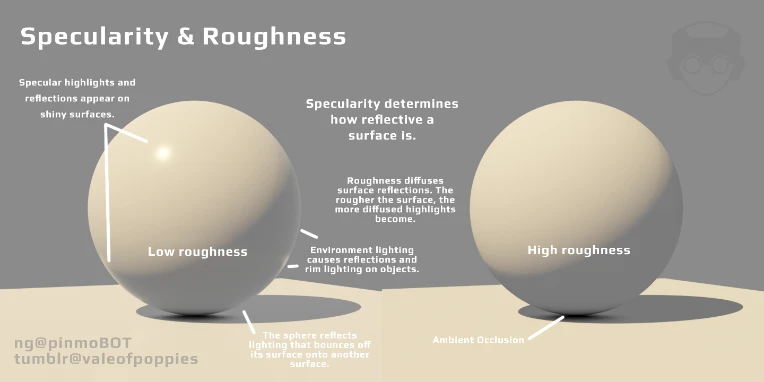
Specular surfaces with low roughness have highlights over lit areas. Points that are facing the main light source directly have the highest intensity. Reflective surfaces also have mach bends on edges that are exposed to other light sources.
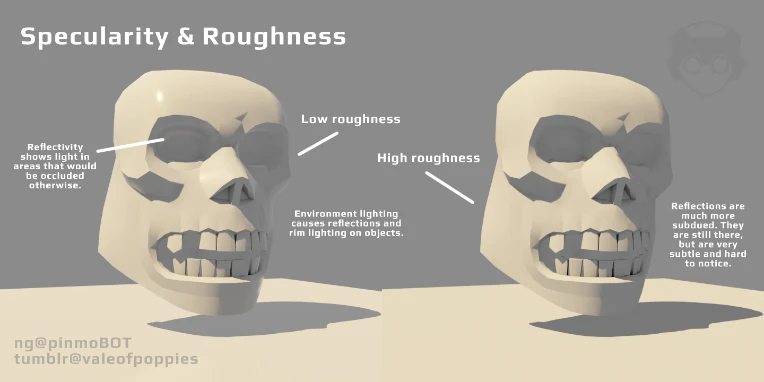
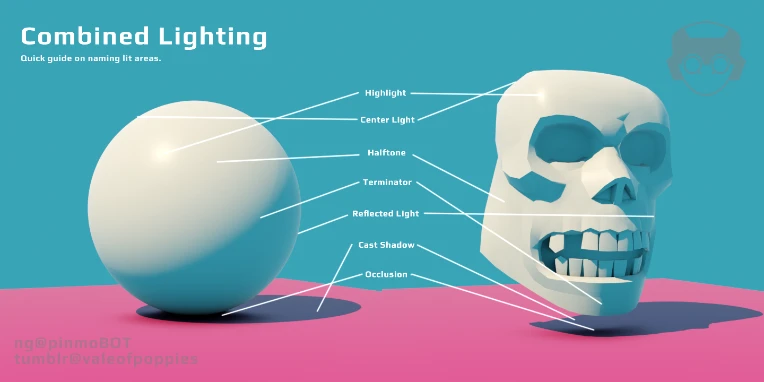
Illustration naming the different areas of lit objects. The point is to make note of them so that you'll be able to manipulate them if you want to make more complex renderings, paintings or drawings. It's up to you how you want to use them.
Thanks for stopping by to look through. Feel free to ask any questions if you have any and I hope this info can be of use to you for making art here on Newgrounds!